Interactive design-Project 1/Prototype Design
Start From 23.09.2023
18.09.2023 - 2.10.2023/Week 4-Week 6
Kong Cai Yi / 0363862
Interactive design / Bachelor of Design (Hons) in Creative
Media
Project 1: Prototype Design

INDEX
LECTURES:
- Week 1/ Intro
- Week 2 /Class activity & Usability
- Week 3/ Understanding Website Structure
- Week 4/ The Web and Language
- Week 5/ ID and Class Attribute
- Week 6/ CSS Selectors
- Week 7/ Box Model in CSS
- Week 8/Independent Learning Week
- Week 9/ Class Cancelled
LECTURES
Week 1/ Intro
Mr Shamsul brief us all about this module, we are required to sign up
Netlify app for future project usage. He assigned us exercise 1 which is
analyse an existing website and identify areas for improvement help us develop our critical thinking skills and gain insights into web design best practices.
Week 2/ Class activity & Usability
Class activity:
- We are divided into 4 groups, each group is assigned a scenario in which they need to design a new interface to solve a particular problem or meet a particular user need.
- Each group need to sketch out their design ideas and create a basic prototype using paper, cardboard, or other simple materials. (A4 Paper) Each group need to test their prototype for usability by having another group act as "users" and attempt to complete a task using the product or interface.
Usability:
- Usability is designing a products for user satisfaction. Usability refers to how effectively, efficiently, and successfully a particular user can utilise a product or design in a certain situation.
- It is a part of User Experience (UX) Design. It is the second level of UX Design.
- Key Principle of Usability:Consistency
- Consistency
- Simplicity
- Visibility
- Feedback
- Error Prevention
Week 3/ Understanding Website Structure
- Website structure is the foundation of a user-friendly and accessible website.It affects user experience, SEO, and overall website performance.A well-structured website helps users find information easily and keeps them engaged.
- Websites are typically divided into three key elements:
- Header:
- Body:
- Footer:
The header is the top section of a webpage.It usually contains the
website's logo, navigation menu, and contact information.The header
provides users with quick access to essential information and navigation.
The body is the main content area of a webpage.It contains text, images,
videos, and other multimedia elements.Proper organization of content
within the body is crucial for readability.
The footer is located at the bottom of a webpage.It typically includes
copyright information, links to important pages, and contact details.The
footer provides closure to the webpage and additional navigation options.
Week 4/ The web and language
Structure of web page:
- Understanding structure
- Learning about markup
- Tags and elements
HTML Describes the structure of pages:
- The HTML code is made up of characters that live inside
- angled brackets <>
- These are called HTML elements
- Elements are usually made up of two tags: an opening
- tag and a closing tag
- <element>Information</element>
- Each element tells the browser something about the
- information that sits between its opening and closing tags

Fig 0.1 Opening tag(19.09.2023-Week 4)

Fig 0.2 Closing tag(19.09.2023-Week 4)

Fig 0.2 Structure(19.09.2023-Week 4)
Some note about HTML:
- Save: Command S
- bold: <b></b>
- Italic: <i></i>
- Line:<hr/>
- List:<li></li>
- Link: <a></a> <a href=”https…..copy their website”>Link</a>
- Link Open to new window: <a href=”https…..copy their website” target=_blank”>Link</a>
- Include title: <a href=”https…..copy their website” target=_blank” title=”…..”>Link</a>
- Image:<img src=“images/file name” alt=“file name” tittle=“file name” width=“200”/>

Fig 0.3 In-class Exercise(19.09.2023-Week 4)
Week 5/ ID and Class Attribute
ID attribute:
- Every HTML element can carry the ID attribute
- It is used to uniquely identify the element from other elements on the page
- It is important that no two elements have the same value for their ID attributes (otherwise the
- value is no longer unique)
- Giving an element a unique identity allows you to style it differently from any other instance of the same element on the page.
- Eg: you might want to assign one paragraph within the page a different style from all of the other paragraphs
- Every HTML element can also carry a class attribute.
- Sometimes you will want a way to identify several elements as being different from the other elements on the page.
- For example, you might have some paragraph of the that contain information that is more important than others and want to distinguish between these elements.
- The class attribute on any elements can share the same value or name.
Block elements:
Elements


CSS Color
Best Web Safe Fonts for HTML and CSS
The following list are the best web safe fonts for HTML and CSS:


Why There Are Many Selectors?


The Display Property
c. Other Display Properties


- Some elements will always appear to start on a new line in the browser window
- It is know as block level elements
- Example: <h1>, <p>, <ul> and <li>
- Some elements will always appear to continue on the same line as their neighbouring elements
- It is know as inline elements
- Example: <b>, <i>, <em>, <a> and <img>
- CSS allows you to create rules that specify how the content of an element should appear
- Example, you can set the background of the page is cream, all paragraphs should appear in gray using the Arial typeface, or that all level header should be in a blue, italic, Helvetica typeface
Elements
- CSS works by associating rules with HTML elements. These rules govern how the content of specified elements should be displayed.
- A CSS rule contains two parts: a selector and a declaration


Fig 0.4 CCS Style element(25.09.2023-Week 5)
CSS Color
- Set Background color on text
- Set color on text
- Set border color
- Set background color
- Set background image
- Set background repeat
- Set background attachment
- Background shorthand
- Text Color
- Text Alignment
- Text Decoration
- Text Transformation
- Text Spacing
- text-indent
- letter-spacing
- word-spacing
- Text Shadow
Best Web Safe Fonts for HTML and CSS
The following list are the best web safe fonts for HTML and CSS:
- Arial (sans-serif)
- Verdana (sans-serif)
- Tahoma (sans-serif)
- Trebuchet MS (sans-serif)
- Times New Roman (serif)
- Georgia (serif)
- Garamond (serif)
- Courier New (monospace)
- Brush Script MT (cursive)


Fig 0.5 In-class exercise(25.09.2023-Week 5)
Week 6/ CSS Selectors
CSS (Cascading Style Sheets) selectors are a fundamental part of CSS that allow you to target and style HTML elements on a web page.Selectors are used to define which elements should receive specific styles, such as colors, fonts, spacing, and more.They are a crucial part of web development because they enable you to control the presentation and layout of your web pages.
- Universal Selector: Selects all elements on the page. It's represented by an asterisk (*). Use it with caution, as it can affect all elements and lead to inefficient CSS.

- Element Selector: The simplest type of selector, it targets HTML elements by their tag name.

- ID Selector: Targets an element with a specific id attribute. IDs must be unique within an HTML document. To select an element with a specific ID, use a # symbol followed by the ID name.

- Class Selector: Targets elements with a specific class attribute. Multiple elements can share the same class. To select elements with a specific class, use a . symbol followed by the class name.

- Descendant Selector: Selects an element that is a descendant of another element. You can specify a hierarchy of elements to target. For example, to style all <a> elements inside a <div> with class "container,"

- Child Selector: Selects elements that are direct children of another element. To select only the immediate <li> children of an <ul>, you can use:

- Pseudo-class Selector: Selects elements based on their state or position in relation to other elements. Common pseudo-classes include :hover, :active, :visited, :link, :focus, and :nth-child(n)

- Pseudo-element Selector: Selects parts of an element rather than the element itself. Common pseudo-elements include ::before and ::after, which are used to add content before or after an element.

Why There Are Many Selectors?
- Specificity
- Structure
- Attribute-Based Selection
- Pseudo-Classes and Pseudo-Elements
- Responsive Design
- Stateful Interactions
- Cross-Browser Compatibility
- Ease of Maintenance
- Accessibility
In Class Exercise (Tutorial):


Fig 0.6 In-class exercise (3.10.2023-Week 6)
Week 7/ Box Model in CSS
The Display Property
- Display is CSS's most important property for controlling layout.
- Every element has a default display value depending on what type of element it is.
- The default for most elements is usually block or inline.
- <div> is the standard block-level element. A block-level element starts on a new line and stretches out to the left and right as far as it can.
- <span> is the standard inline element. An inline element can wrap some text inside a paragraph <span> like this </span> without disrupting the flow of that paragraph.
- Inline-block
- Flex
- Grid
Box Model in CSS


- Most HTML elements are containers. Consider some of the HTML elements we've used so far: body, p, h1, h2, div, ul, ol, li.
- Each of these is a container, or box.
- Each box has three layers that surround its content. The layers are, in order from inside to outside:
- Padding
- Border
- Margin

Fig 0.7 Box Model (9.10.2023-Week 7)
- The size of each of the layers in the box model can be specified using the usual CSS units of measure (em, %, and px).
- For example, consider the following <p>, which is wrapped inside a <div>:


Fig 0.8 Example (9.10.2023-Week 7)
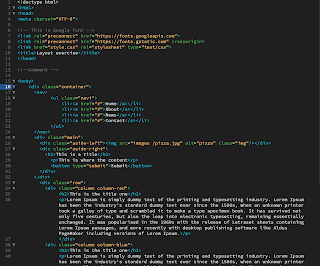
In Class Exercise (Tutorial):


Fig 0.9 HTML code view (9.10.2023-Week 7)


Fig 0.10 CCS code view (9.10.2023-Week 7)


Fig 0.11 Final Outcome- Preview (9.10.2023-Week 7)
Week 8/ Independent Learning Week
In This Week, I finalise my project 2.Week 9/Final Project Briefing
In this week, Mr Shamsul brief us about our final project which is creating a single page website for our favourite artist. He also take some time checking our project 2 and give some feedback for final improvement such as let our website works effectively.Week 11/ Link Within Section
Mr Shamsul teaches us all those link within section for helping us to create our final project website, we are required to show our prototype and sketches for him to check our progress.

Fig 0.12 Link Within Section(6.11.2023-Week 11)
INSTUCTIONS
<iframe
src="https://drive.google.com/file/d/131kfj0FzZefJeIRNVXvbSKwWB1m6VhnZ/preview"
width="640" height="480" allow="autoplay"></iframe>
Part 1: Prototype Design – Digital Resume/CV
Requirements:
1. Content and Structure:
Requirements:
1. Content and Structure:
- Prepare the content for your resume, including personal details, education, work experience, skills, projects, and other relevant sections.
- Decide on the order and hierarchy of sections based on their importance and relevance.
2. Layout and Visual Design:
- Design the layout of your digital resume using the chosen prototyping software.
- Define the placement of different sections and how they will flow together.
- Apply a consistent visual design using typography, color palette, and appropriate spacing.
3. Sections and Organization:
- Organize your resume into logical sections, such as "Profile," "Education," "Experience," "Skills," "Projects," and "Contact."
- Prioritize sections based on their relevance and significance to the position you're targeting
4. Visual Elements:
- Incorporate relevant images, icons, or placeholders that align with the content and enhance the visual appeal of your digital resume.
5. Prototype Presentation:
- Update your e-portfolio explaining and showcasing the processes of the task
Sketches
We are required to draw a 5 sketches before we proceed to Figma/XD.


Fig 1.1 Sketches (20.09.2023-Week 4)
Digitalise (Figma):
- With: 1330
- Height: 2075
- Layout Grids: 12 Column


Fig 1.2 Process in Figma (29.09.2023-Week 5)
First Attempting:

Fig 1.3 First version(1.10.2023-Week 5)
Amend:I decided to add some icon, make it looks like more professional. Other than that, I change the position between "Projects" and "Experience", make it become more coordinate.

Fig 1.4 Adjustment (2.10.2023-Week 6)
I provided two version for projects category, because I am wondering if
proceed to next stage is it better to have images.
.jpg)

Fig 1.5 Final Compilation (2.10.2023-Week 6)


Comments
Post a Comment